
I have recently been doing some lab experiments with VMware vSphere. I’m running three ESXi hosts with vCenter Server Appliance on one of them. Out-of-the-box vCenter comes with a self-signed certificate, which means ignoring the SSL warning on every log-on. Instead, I wanted to implement a valid certificate from a private Microsoft Certificate Authority (CA). Here is a how-to:
1. Set up Active Directory Certificate Services (AD CS) with Certificate Authority and Web-Enrollment:

Since this was a lab for testing purposes only I deployed the Root CA directly on a domain controller. In an enterprise deployment, it would be recommended to deploy a Two-Tier PKI with subordinate CA’s.
2. In Certificate Templates Console, duplicate “Web Server” template.

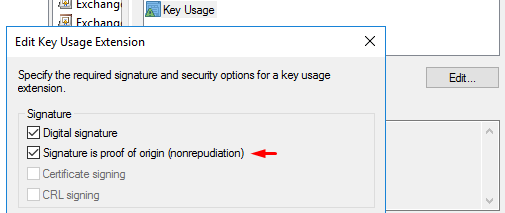
3. Set compatibility to “Server 2008 / Windows 8”. Go to Extensions, remove “Server Authentication” (under Application Policies). Also tick “Signature is proof of origin” (under Key Usage). Name the template “vSphere 6.x” and set a 5 year validity period:


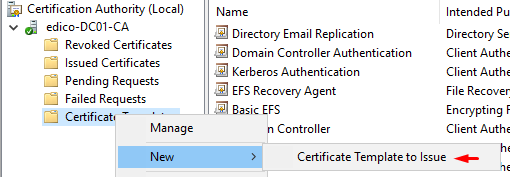
4. Issue your new template to CertSrv:
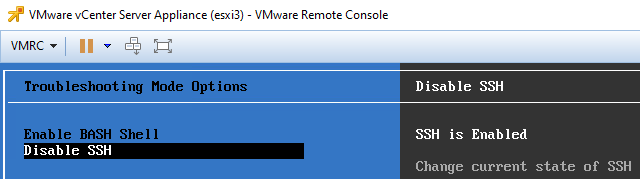
5. Make sure you have enabled SSH and BASH shell on vCenter server appliance. You can do this from VMWare Remote Console:
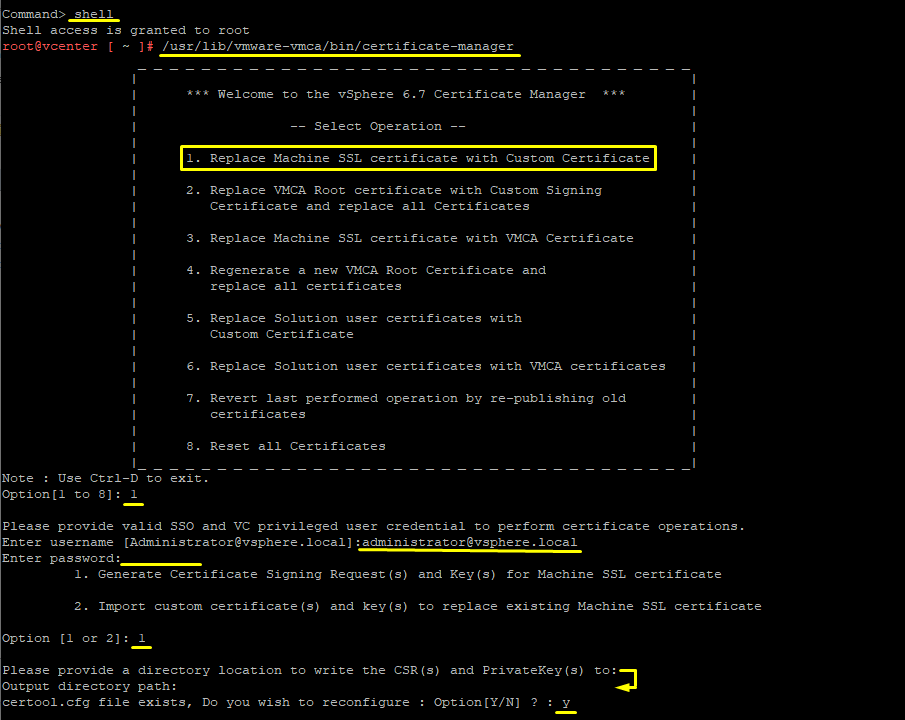
6. Now, SSH into vCenter server appliance with Putty. Log in with root and go to shell mode to bring up vSphere Certificate Manager with:
shell
/usr/lib/vmware-vmca/bin/certificate-manager
Choose 1 (Replace machine SSL certificate with custom certificate). Provide vSphere’s default SSO (administrator@vsphere.local). (My vCenter was already AD integrated, but it seems like AD credentials did not have sufficient permissions for this task. So use the default SSO).
Choose 1 (Generate certificate signing request(s) and Key(s) for Machine SSL certificate. When asked for directory, just press enter (you are in /root). Press Y to reconfigure certool.cfg.
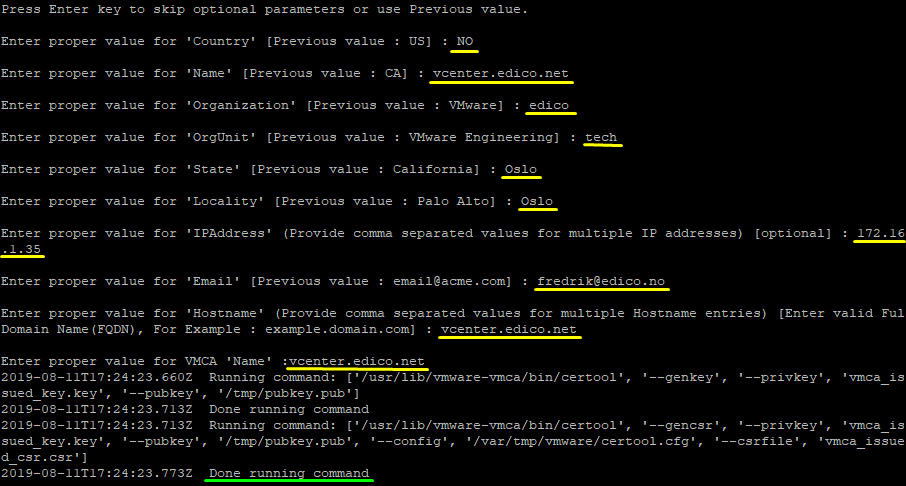
7. vSphere certificate manager will now prompt you for the following values:
- Country: Two letter country code
- Name: FQDN of your vCSA
- Organization: Your organization name
- OrgUnit: Name of your unit/department
- State:State or country name
- Locality: City
- IPAddress(optional): vCSA IP address
- Email: your email address
- Hostname: FQDN of your vCSA
- VMCA Name: FQDN of your VMCA (typically use FQDN of your vCSA
8. The certificate request is updated and can now be grabbed from the server appliance. This can be done using WinSCP. Do not close the Putty connection, we are going back there later.
Before you use WinSCP to SFTP into the server appliance, you’re gonna have to set up WinSCP with the following settings (otherwise you would get a SFTP packet error. This applies to VCSA 6.5+ :

Now connect using SFTP protocol, root credentials and port 22. Transfer both files to your local machine:

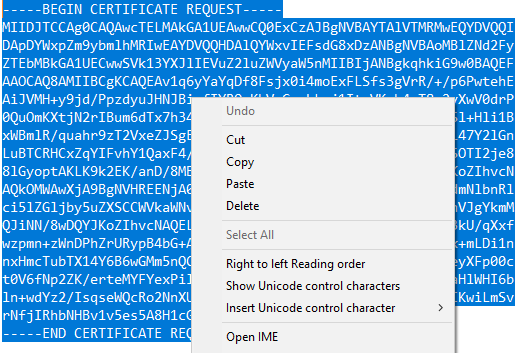
9. Open vmca_issued_csr.csr and copy the request:
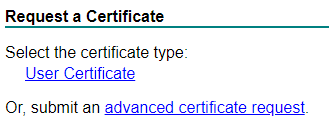
10. Go to your Microsoft Certificate Authority Web-Enrollment (http://hostname/certsrv) and submit an advanced certificate request. Paste your request here and select your previous created template (vSphere 6.x).

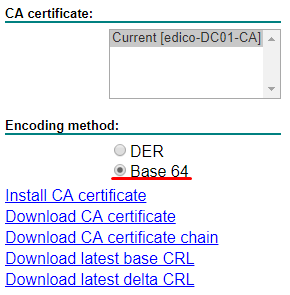
11. Your certificate should be issued by the CA. Choose Base 64 and Download certificate. We also need to grab the Root CA certificate. Again, download the root CA certificate in Base 64:

You should rename both downloaded certificates, for example:
cert.cer
root-ca.cer
12. Upload your Machine certificate (cert.cer) and Root CA certificate (root-ca.cer) using WinSCP to VCSA /root folder:

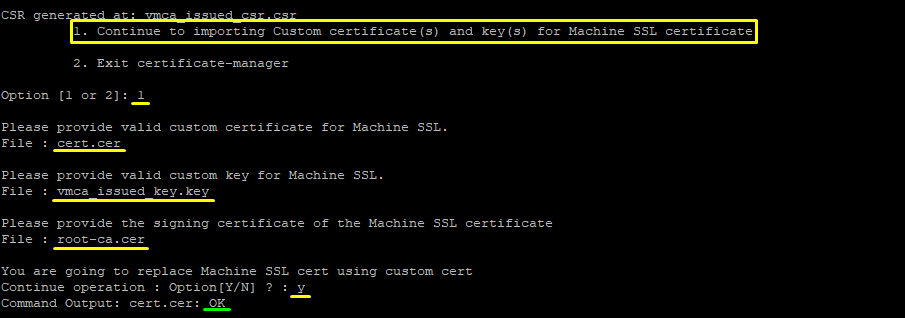
13. Back into Putty, choose 1 to Continue importing custom certificate(s) and key(s) for Machine SSL certificate. Certificate Manager will prompt the following:
Provide custom machine certificate:
 cert.cer

Provide custom key for machine certificate:
 wmca_issued_key.key

Provide the Root CA certificate:
 root-ca.cer
14. Press Y to replace the Machine certificate and update VCSA with your Root CA.
15. Wait for VCSA to replace certificates and update all services. This may take a couple of minutes.

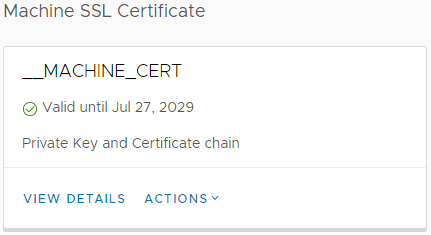
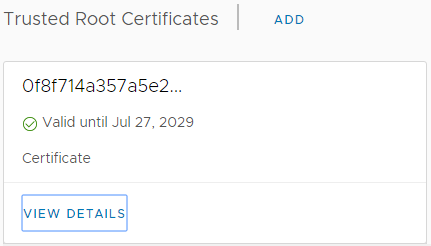
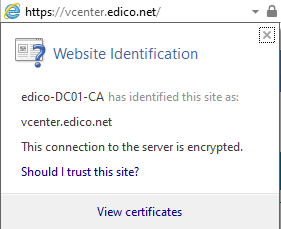
16. Once completed, you are finished. vCenter Server Appliance should now be using your (manually) issued machine certificate and hold the Microsoft Certificate Authority CA as a trusted root.
You can check this in vCenter Certificate Management (Menu > Administration > Certificates > Certificate Manager) and from CertSrv:

Important note:
Since this certificate is issued from a private (locally-hosted) PKI, you will have to manually add your Root CA certificate to trusted root store in MMC or via. Group Policy to let your browser know it’s a safe CA. Only certificates issued from a public trust store (open to the Internet) will automatically be trusted by your browser!
Also note that some browsers (like Firefox) has their own trust store. In that case you would have to add it to Firefox manually or configure Firefox to use Windows certificate store.
Hope this will help you.
Resources:
https://kb.vmware.com/s/article/2108294
https://www.dasher.com/vmware-vcenter-certificate-replacement/
http://www.johnborhek.com/vmware/vmware-vsphere/vmware-vcenter/using-winscp-vmware-vcenter-server-appliance/